
Setting Up Your Expo Trestle Account
Getting started with your Trestle expo account is quick and easy. In just a few minutes, you can generate a unique QR code that expo attendees will use to share their information with you. Your settings are exclusive to your organization and will not be shared with other general contractors. Additionally, your settings will not restrict attendees from submitting their business profiles.
Let's get started!
Step 1: Setting Up Your QR Code
- Sign in to your Trestle account.
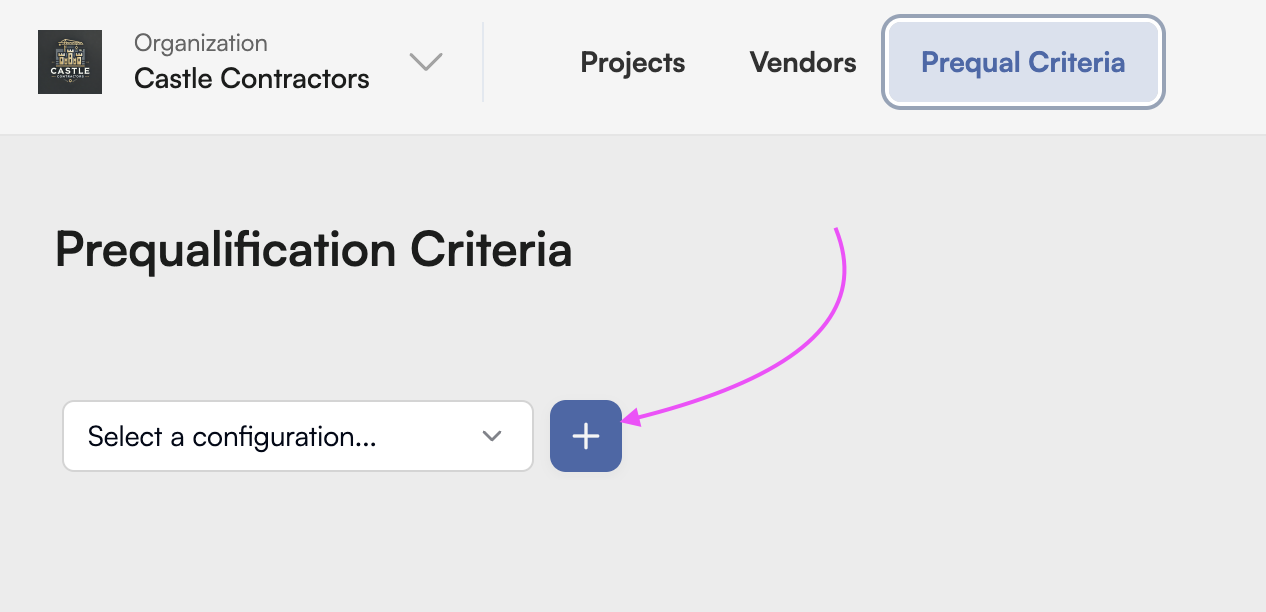
- Navigate to the Prequal Criteria tab on the dashboard (located in the top header bar).

- Create a new configuration:
- Click the blue "+" button next to the dropdown menu
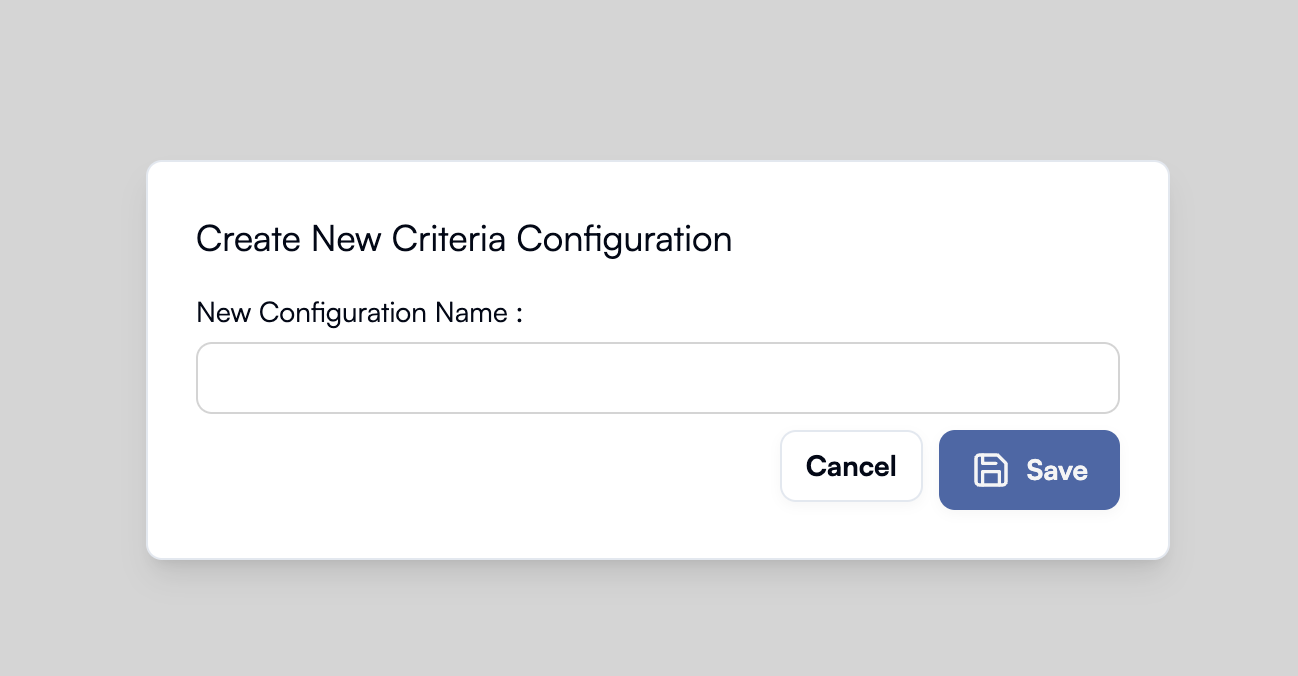
- Name your new configuration and click Save. (Avoid creating duplicate configurations.)
- Your new configuration will automatically be pre-filled with Trestle's standard questions.
- Generate your unique QR code:
- Toggle Trade Show QR Code to ON.
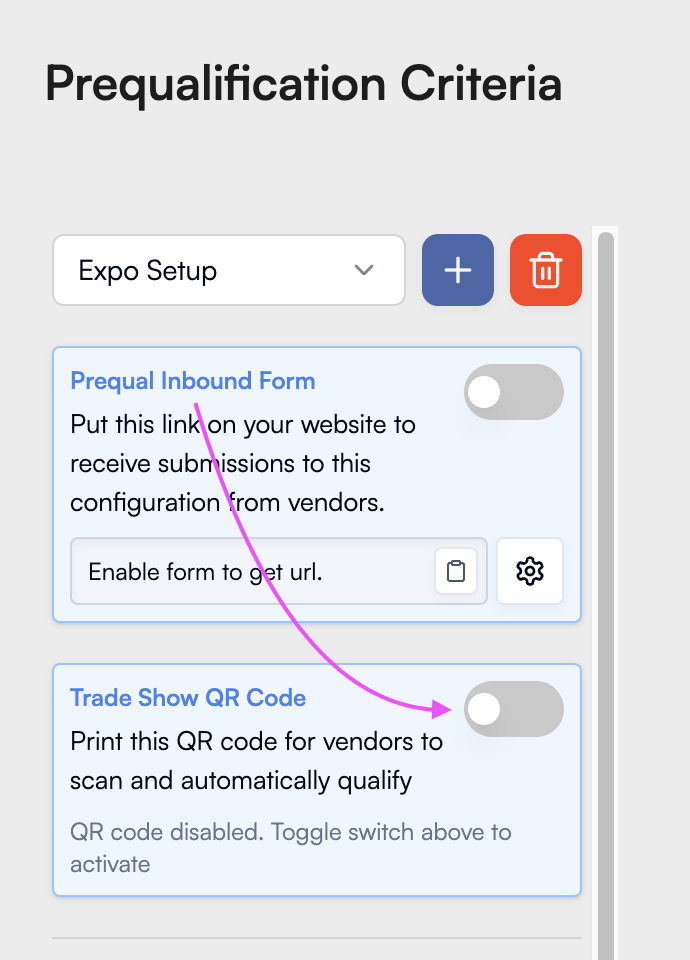
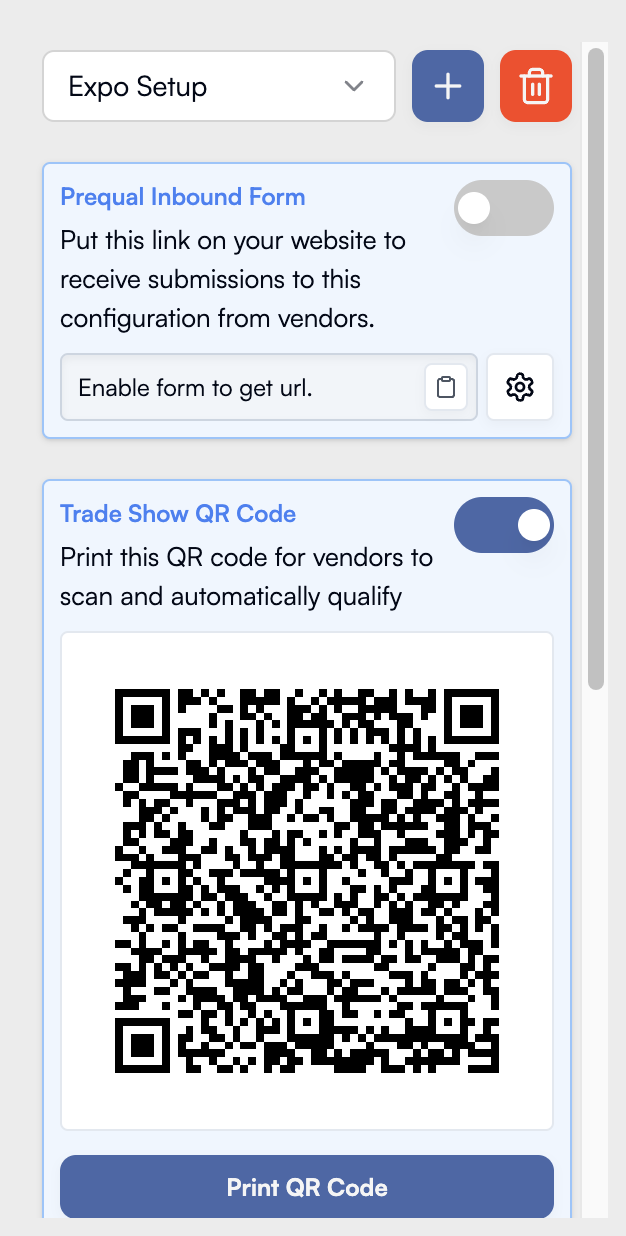
- Trestle will generate a unique QR code for you to print and display at your booth.
That’s it! You’re ready for the expo.
Ensure your QR code is easily accessible for attendees to scan. Any connections made via a QR code scan will automatically appear in your Trestle dashboard, where you can review their business profiles.
Optional: Adding Qualification Logic
Trestle can automatically review and assess business profiles within minutes of a connection being made. These qualifications are based on your custom requirements and are not shared with other general contractors. Attendees can also request a copy of their assessment report to improve their business profile and increase their chances of winning work with you.
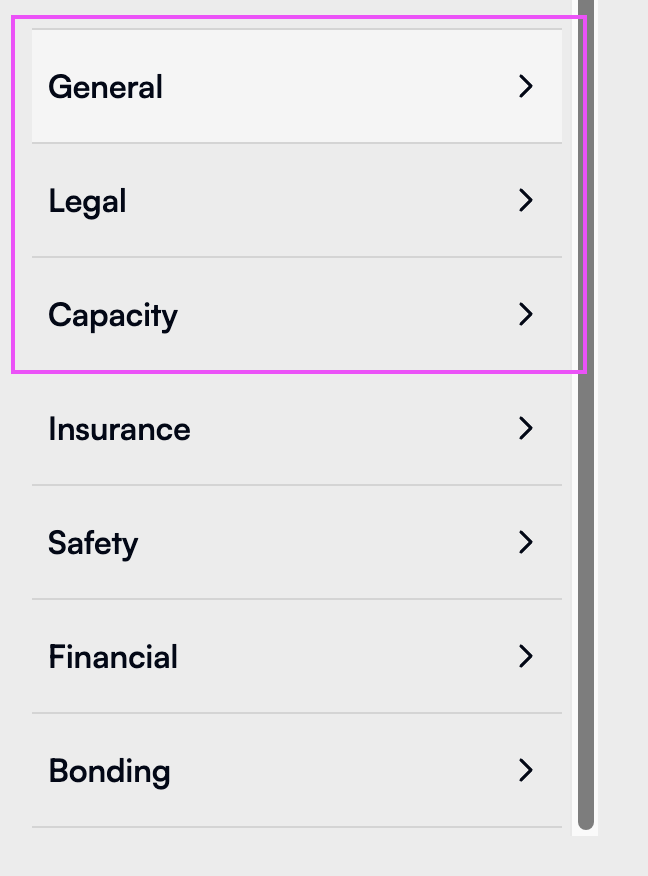
Recommended Focus Areas for Expo Events
For expo and outreach events, we recommend prioritizing these three sections:
✅ General
✅ Legal
✅ Capacity
While additional sections are available, they are more time-intensive to configure.
Enabling Auto-Qualification
If you'd like Trestle to verify and grade attendee-submitted information:
- Click the white "Collected" button to change it to blue "Required".
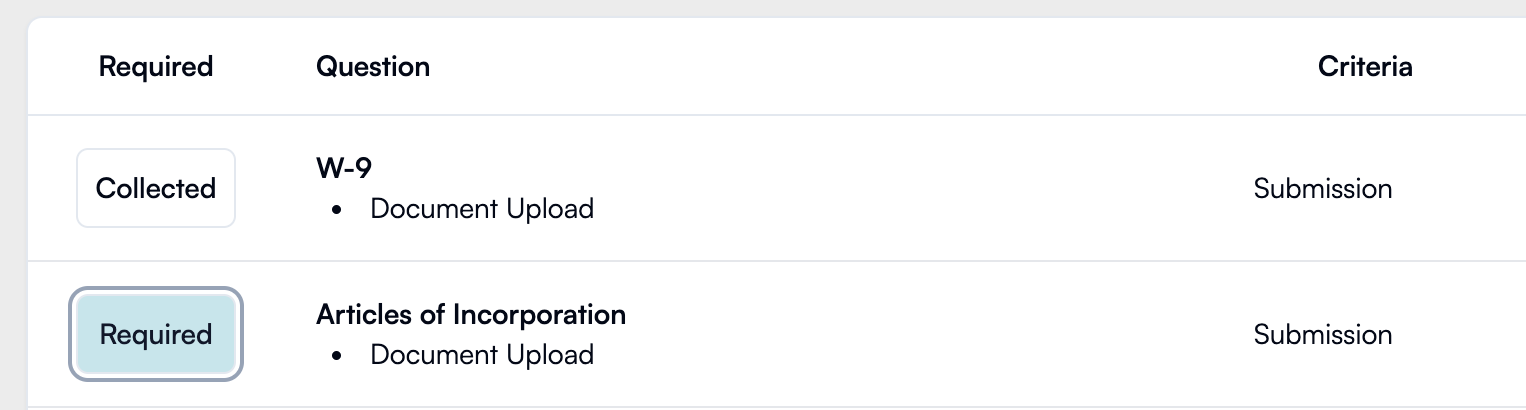
- Trestle will automatically check the attendee’s business profile against your requirements.
- Some criteria allow specific logic settings:
- For Yes/No responses, you can define whether they result in Pass, Conditionally Pass, or Fail.

- Example: A "Yes" response to a specific question can automatically mark the submission as unqualified.
(Note: You do not need to configure grading logic to collect information at the expo. If you need help setting up advanced automation, contact our support team at support@gotrestle.com.)
Step 2: Reviewing Attendee Business Information
Once an attendee scans your QR code, Trestle automatically creates a profile for them in your dashboard.
- Access your attendee database:
- Go to the Vendor page on your dashboard
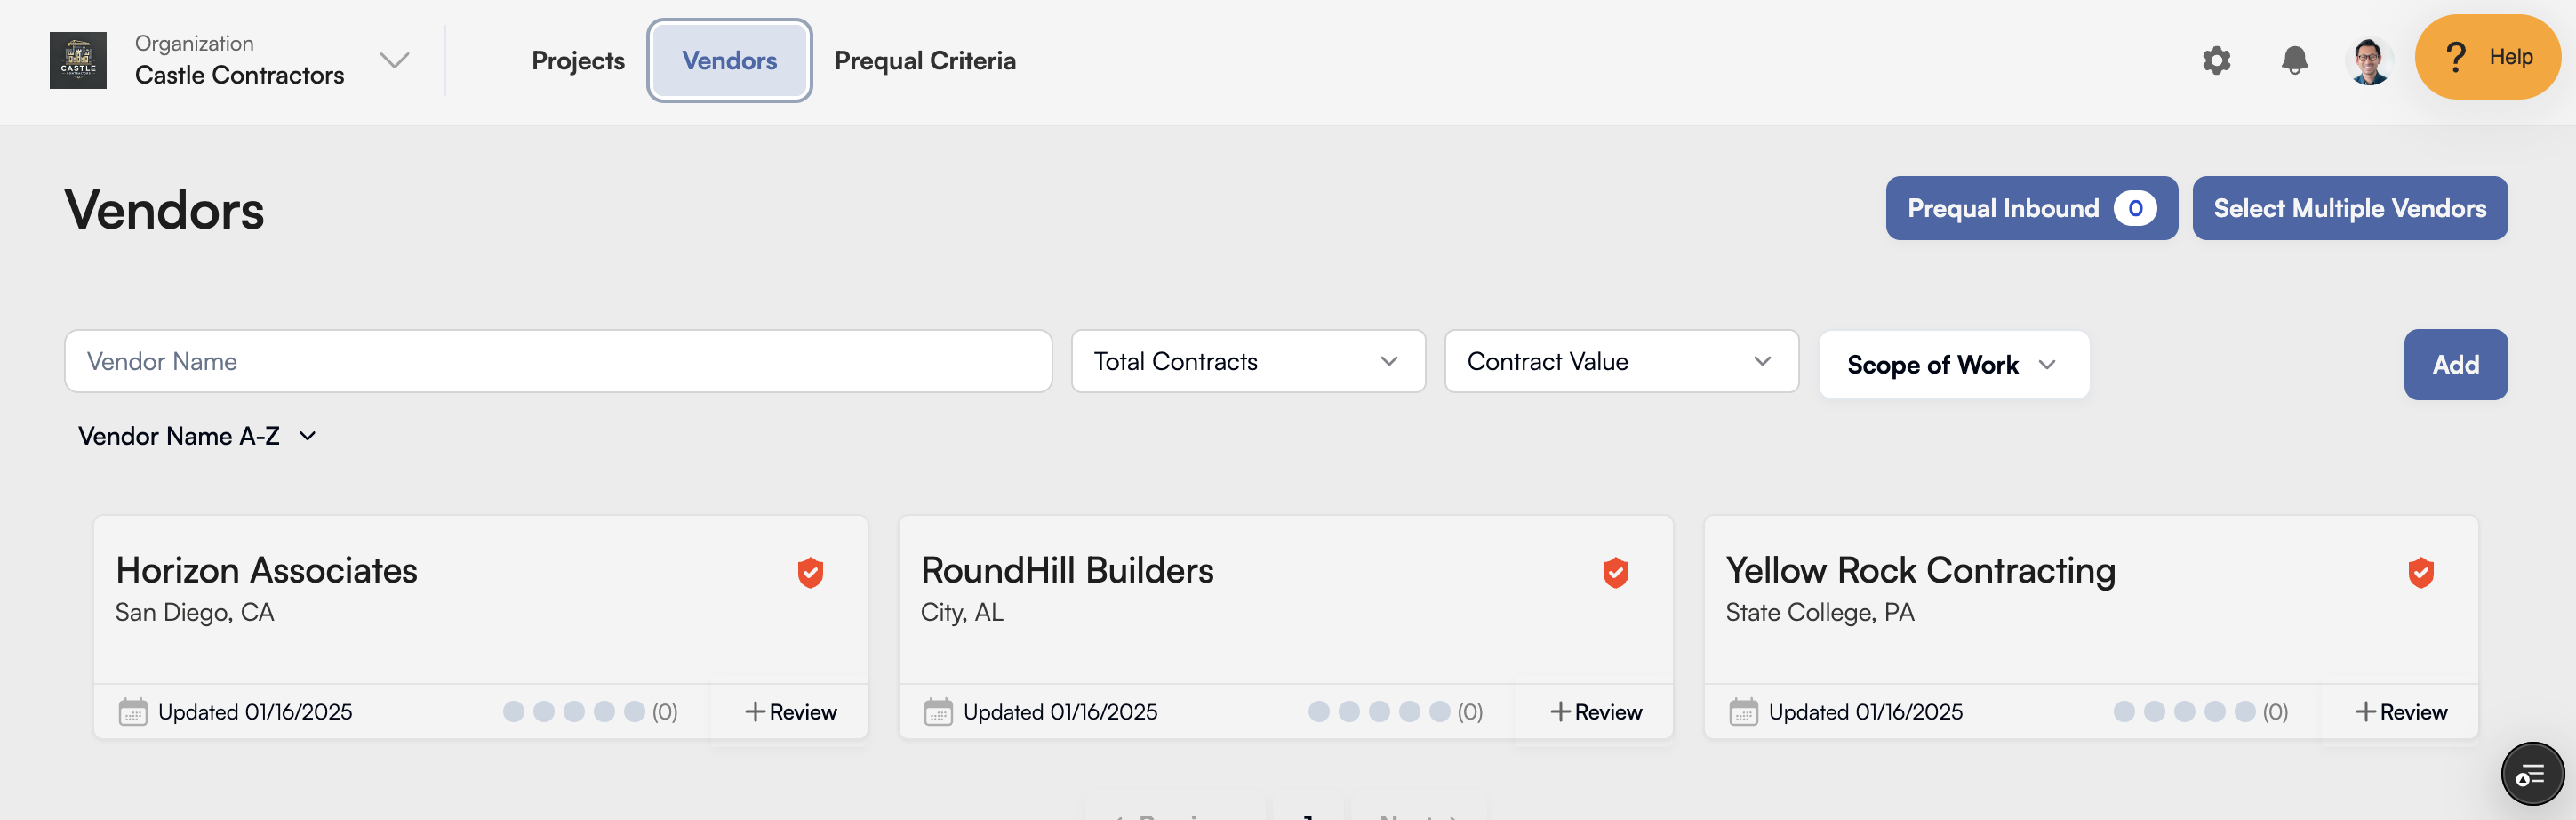
- All connections made at the event will be displayed here.
- View individual profiles:
- Click on a Vendor Card to open the attendee’s business profile.
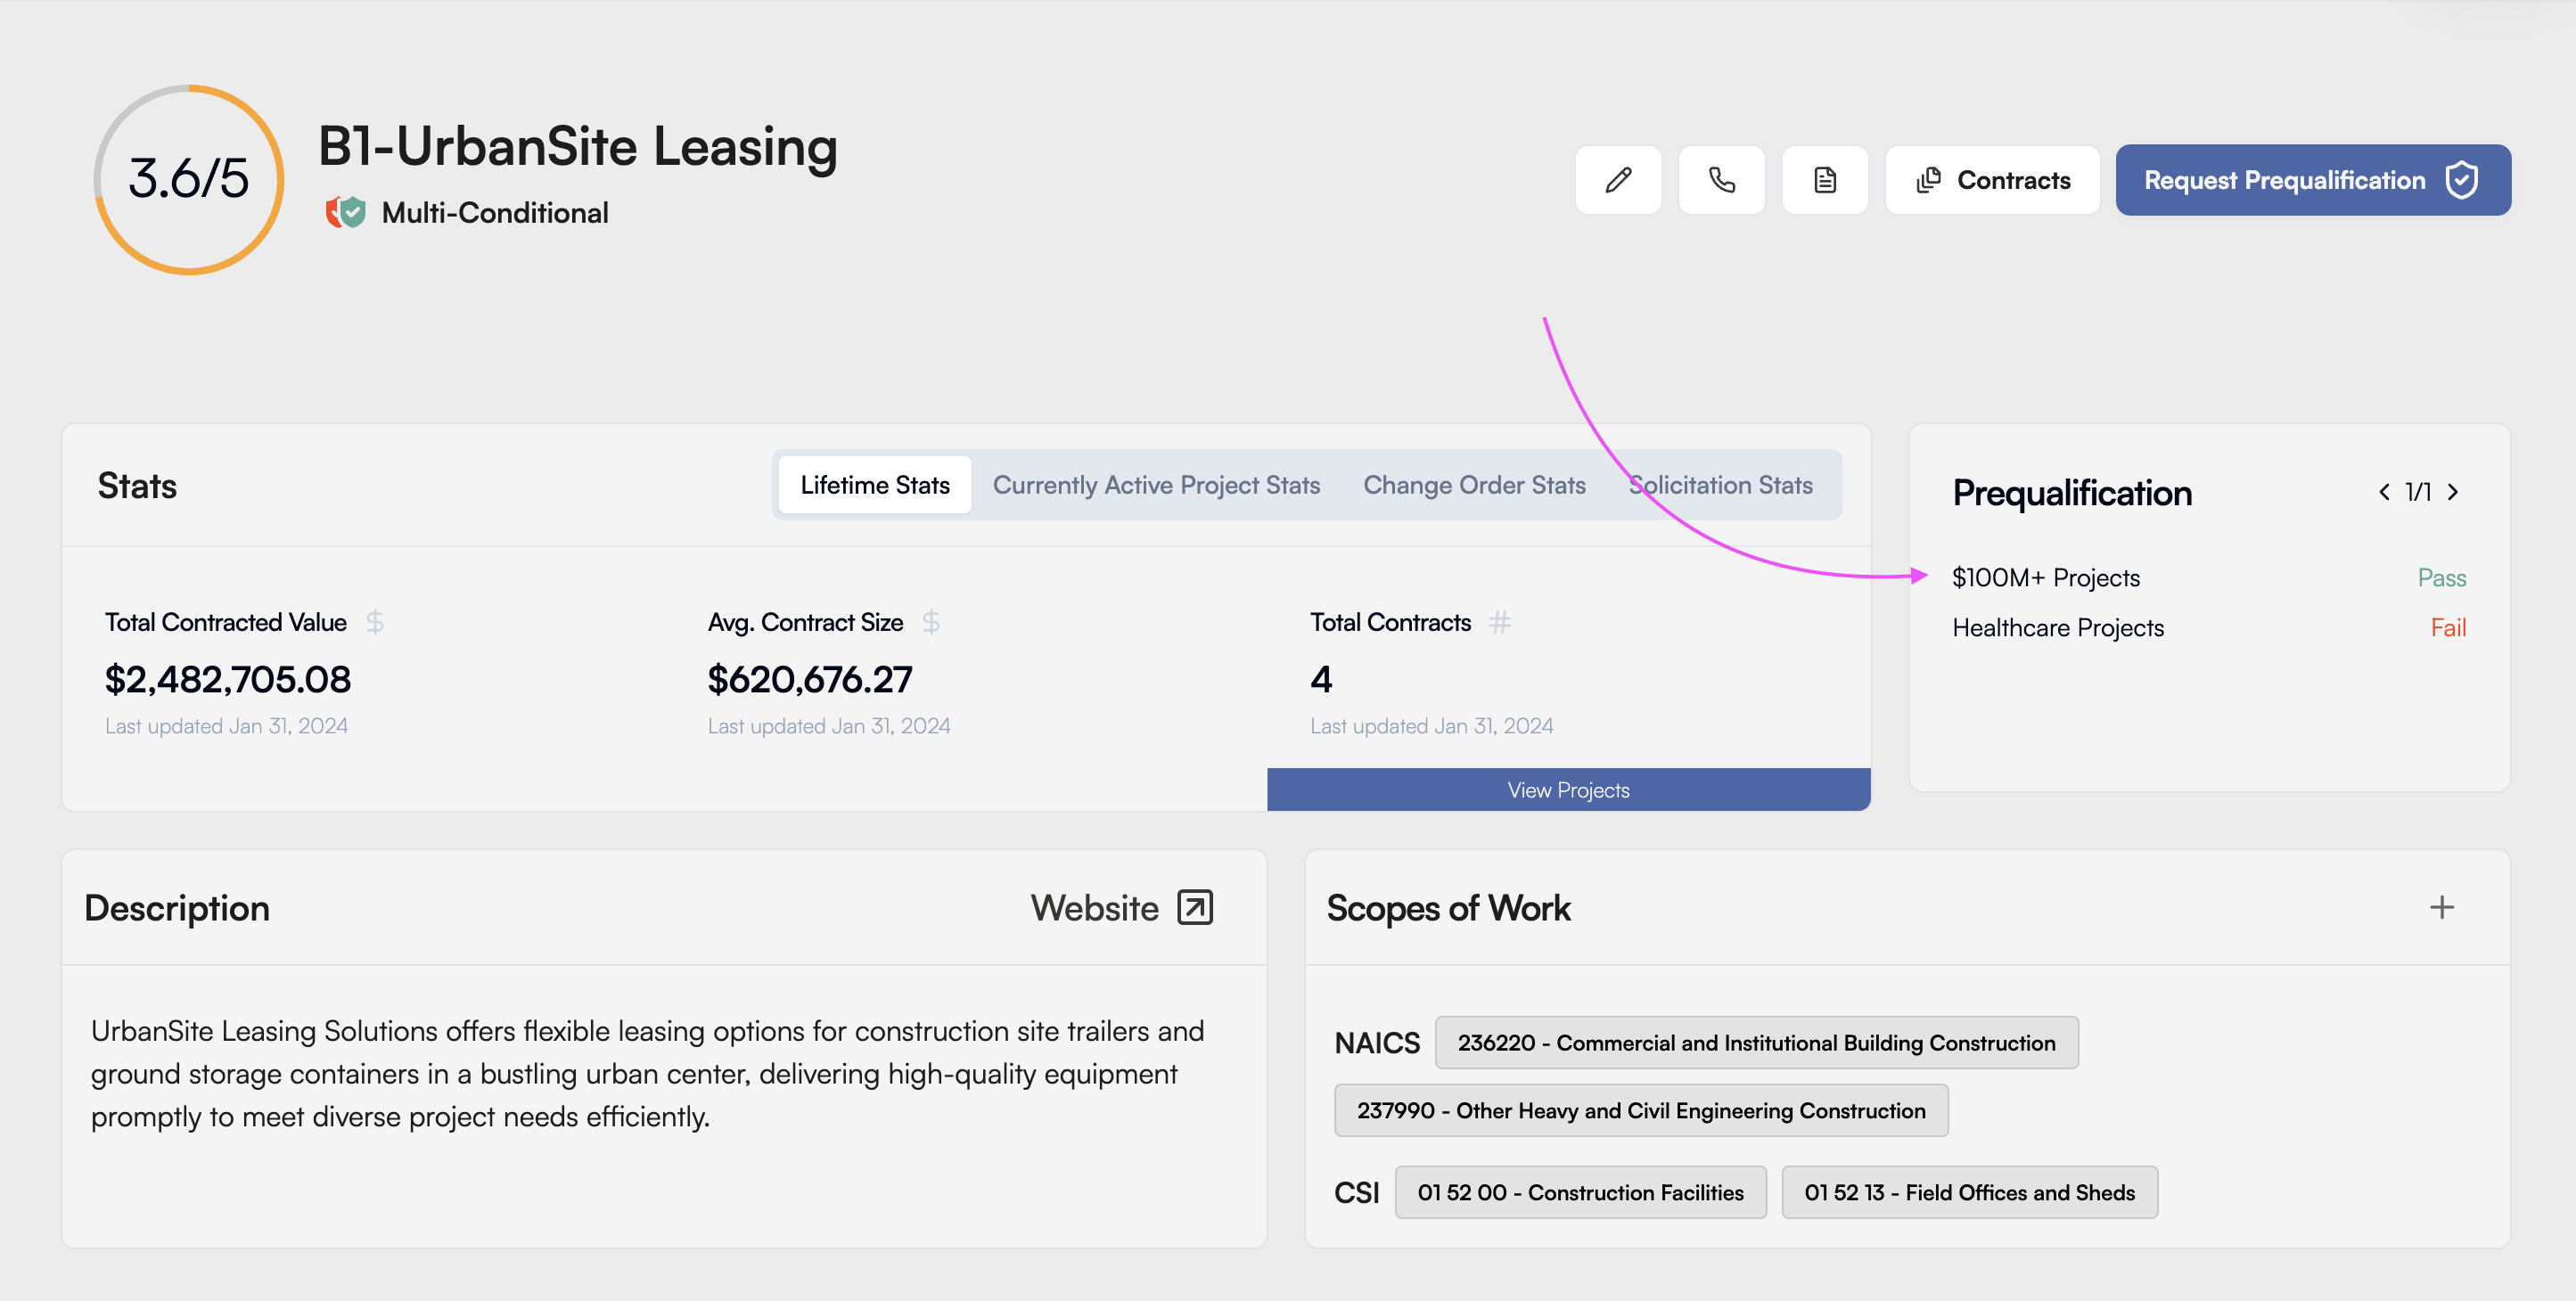
- Their business information submission is located on the right under the Prequalification section.
- Click on the configuration you set up to review their submission.
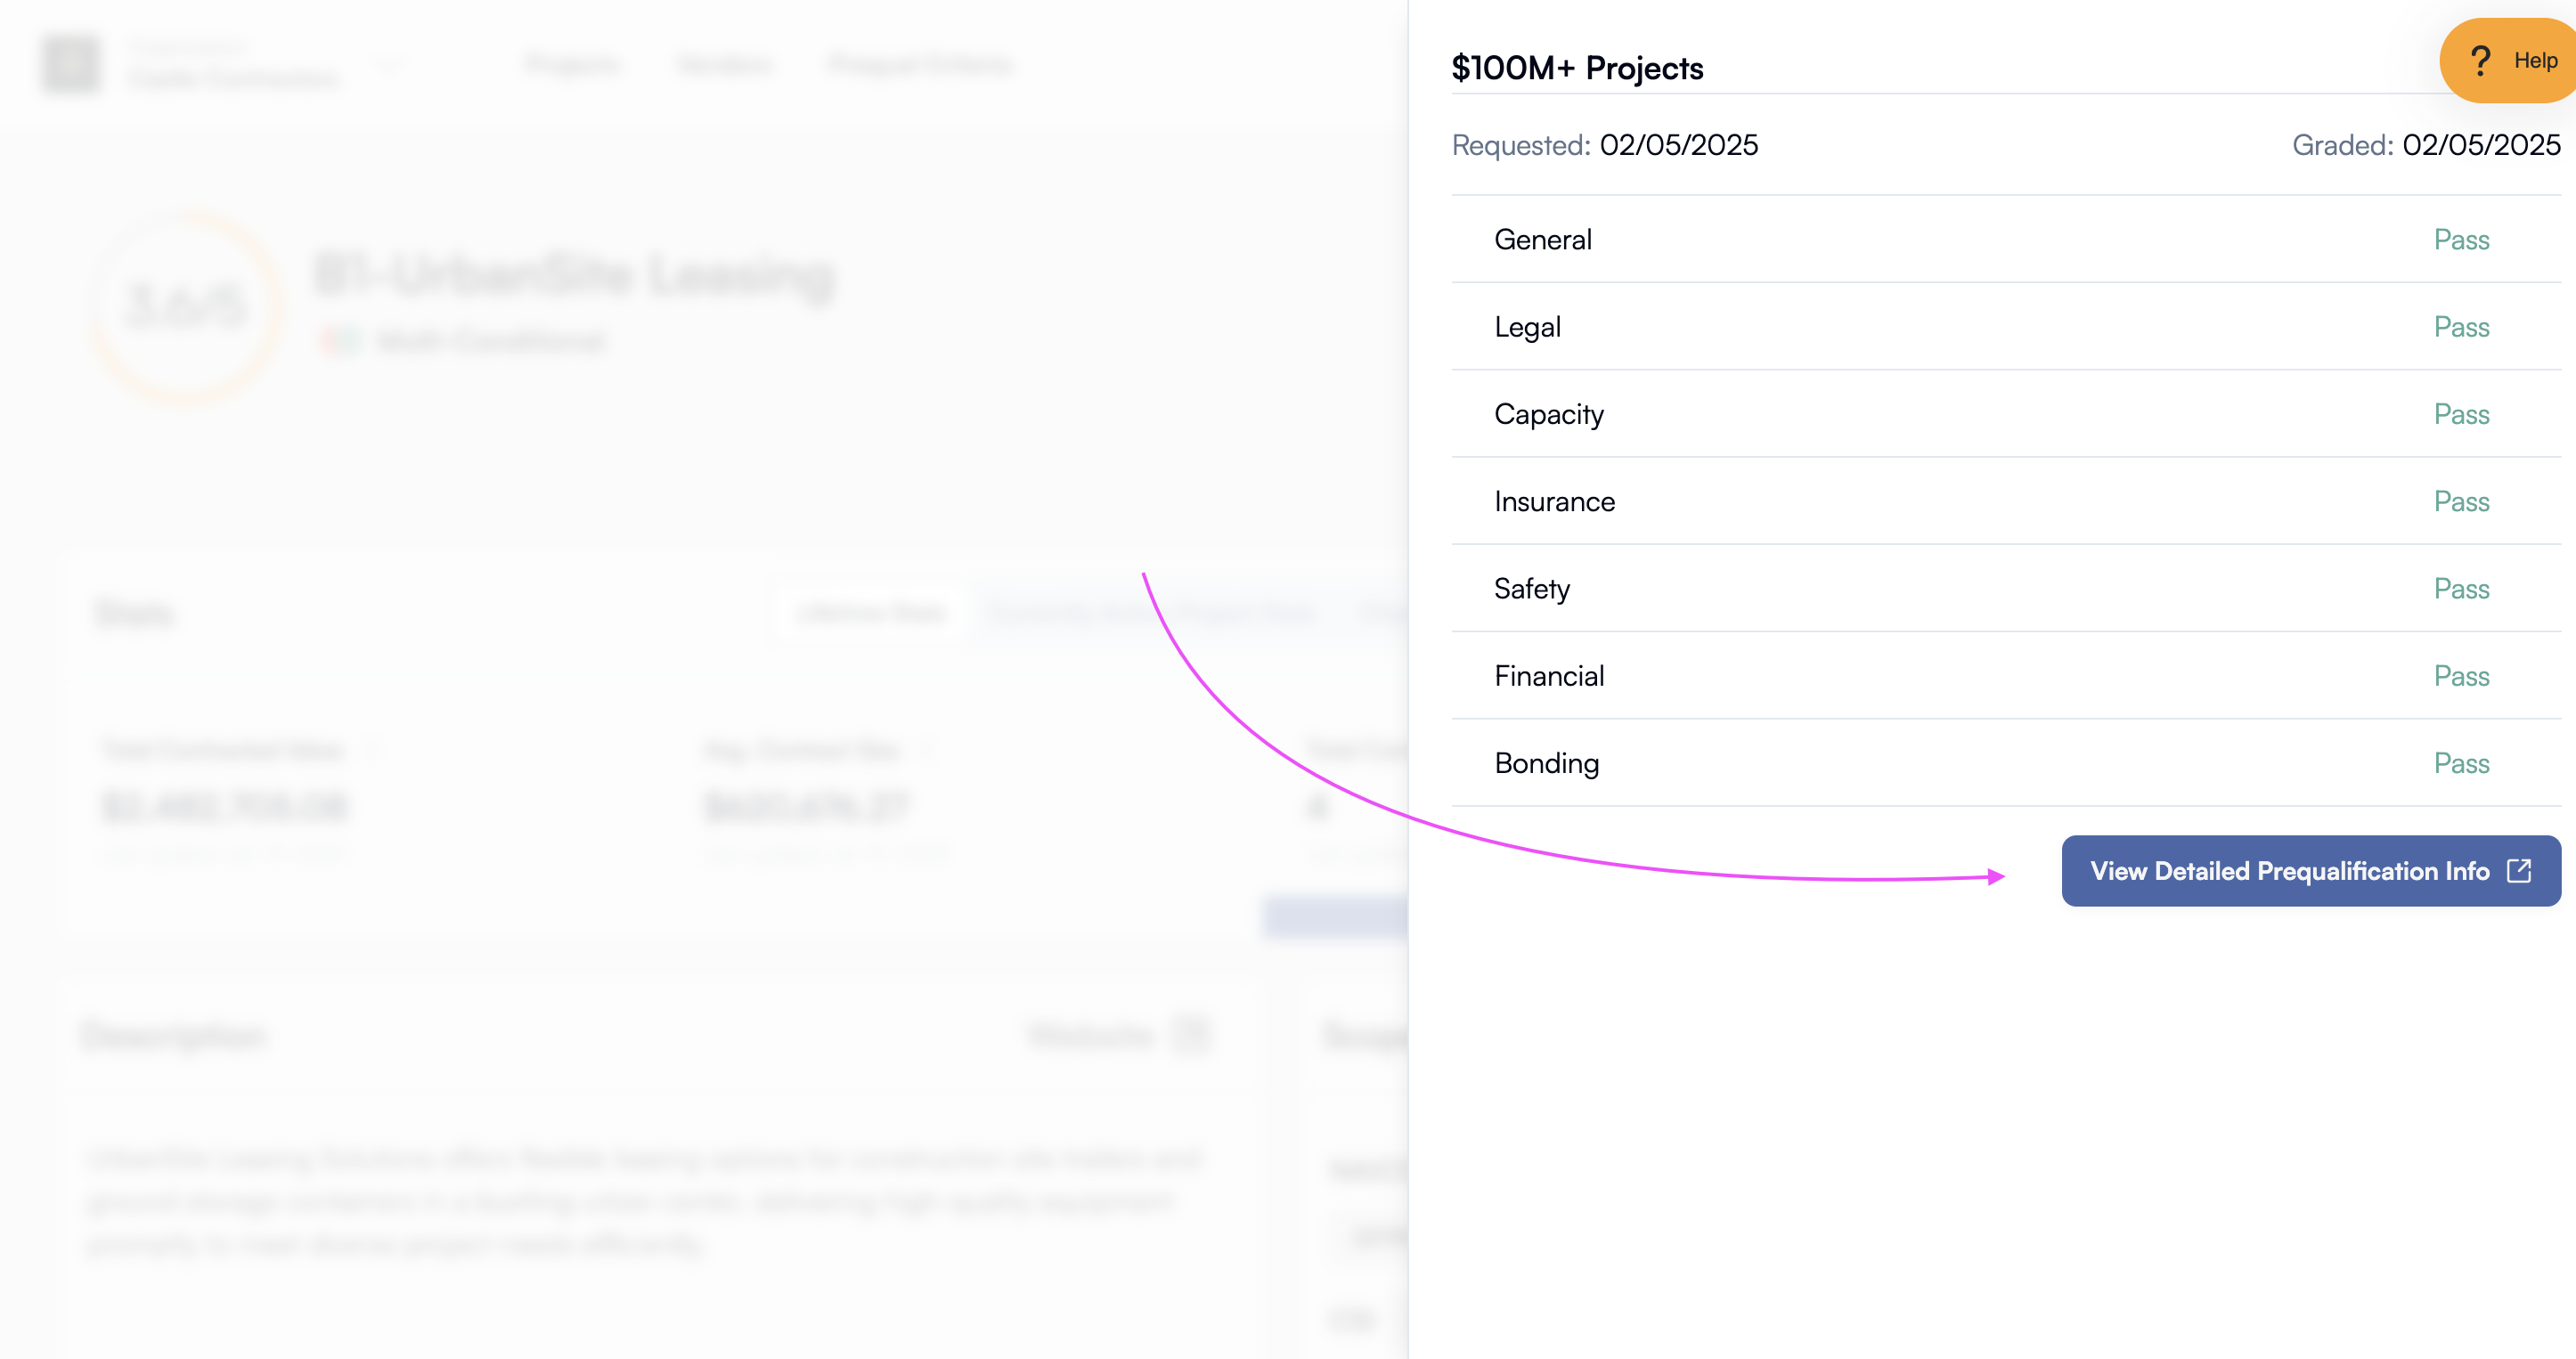
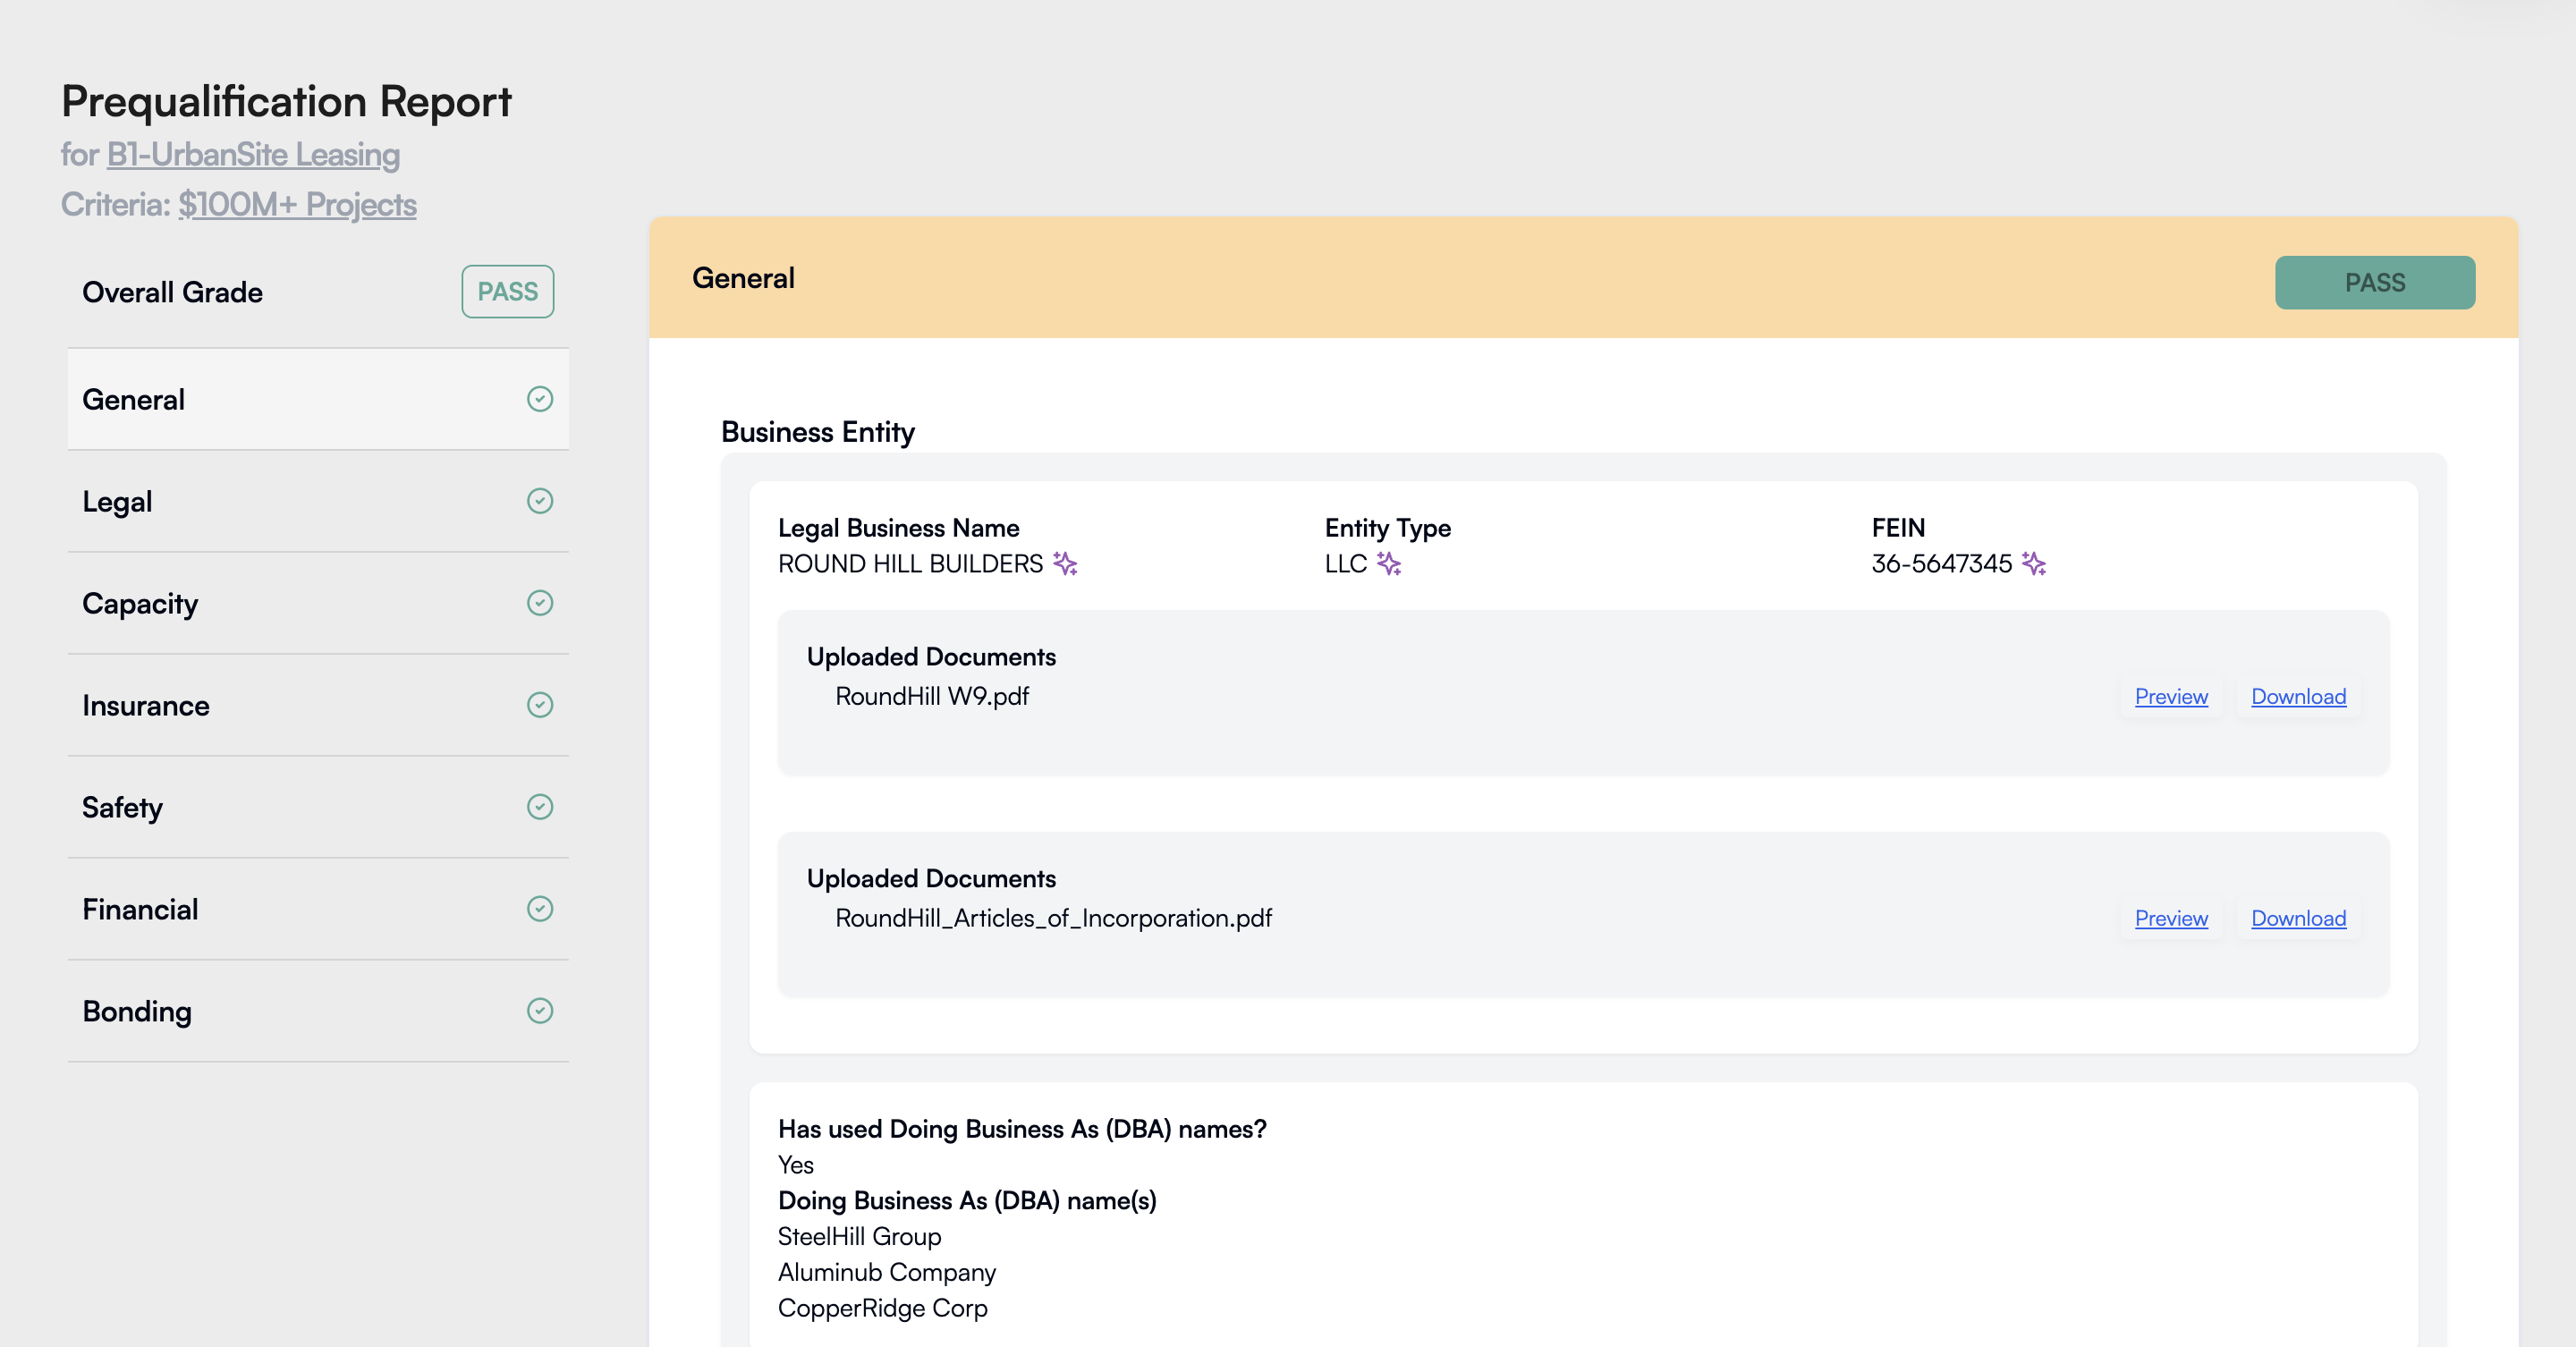
- Check the Detailed Report for a complete list of attendee submitted business information
With Trestle, you can instantly capture, review, and qualify connections at your expo booth—simplifying the process of vendor selection and making every interaction count.
You're all set! 🎉 Now go make the most of your expo event with Trestle. 🚀

